Waterproofing Your Marine Electrical System with Adhesive-Lined Tubes
- May 6
- 3 min read
Water and electricity do not mix well, especially on boats where exposure to moisture is constant. Protecting your marine electrical system from water damage is essential to ensure safety, reliability, and longevity. One effective method to achieve this protection is by using adhesive-lined heat shrink tubes. These tubes provide a strong, waterproof seal around electrical connections, preventing corrosion and shorts caused by water intrusion.
Why Waterproofing Matters on Boats
Marine environments are harsh. Saltwater, humidity, and constant exposure to the elements create a perfect storm for electrical failures. Even small amounts of moisture can cause corrosion on connectors, leading to poor conductivity and eventual failure. Faulty electrical systems on boats can result in:
Engine failure
Navigation system malfunctions
Lighting issues
Safety hazards such as electrical shorts or fires
Waterproofing your electrical connections is not just about convenience; it’s about safety and preventing costly repairs.
What Are Adhesive-Lined Heat Shrink Tubes?
Adhesive-lined heat shrink tubes are specialized sleeves designed to shrink tightly around wires and connectors when heated. The key feature is the inner layer of adhesive that melts during the shrinking process, creating a watertight seal. This combination of heat shrink and adhesive offers superior protection compared to standard heat shrink tubing.
Key Features
Waterproof seal: The melted adhesive fills gaps and bonds to the wire insulation and connectors.
Corrosion resistance: Prevents saltwater and moisture from reaching metal contacts.
Mechanical protection: Adds a layer of insulation and strain relief to connections.
Easy application: Shrinks quickly with a heat gun or torch, bonding firmly in minutes.
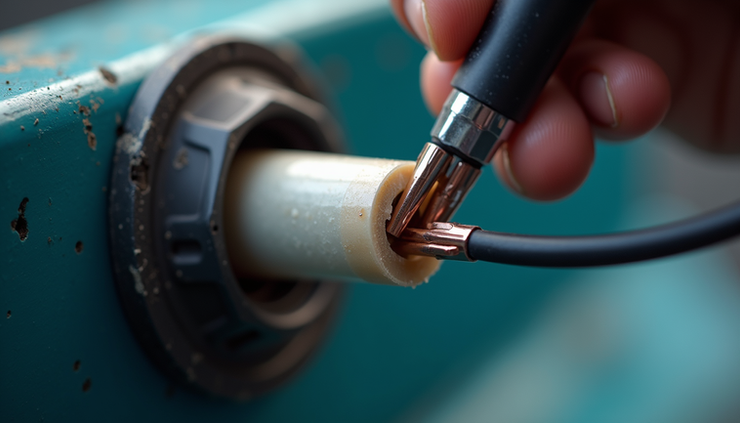
How to Use Adhesive-Lined Tubes for Marine Electrical Systems
Applying adhesive-lined heat shrink tubing is straightforward but requires attention to detail for the best results.
Step 1: Prepare the Connection
Strip the wire ends cleanly without nicking the conductor.
Make the electrical connection using solder or crimp connectors rated for marine use.
Ensure the connection is secure and free of dirt or oxidation.
Step 2: Select the Right Size Tube
Choose a tube diameter slightly larger than the connection before shrinking.
The tube should fully cover the exposed metal and overlap onto the insulation by at least 1/4 inch on both sides.
Step 3: Slide the Tube Over the Connection
Position the adhesive-lined tube so it covers the entire connection area.
Make sure the adhesive side faces inward toward the wire and connector.
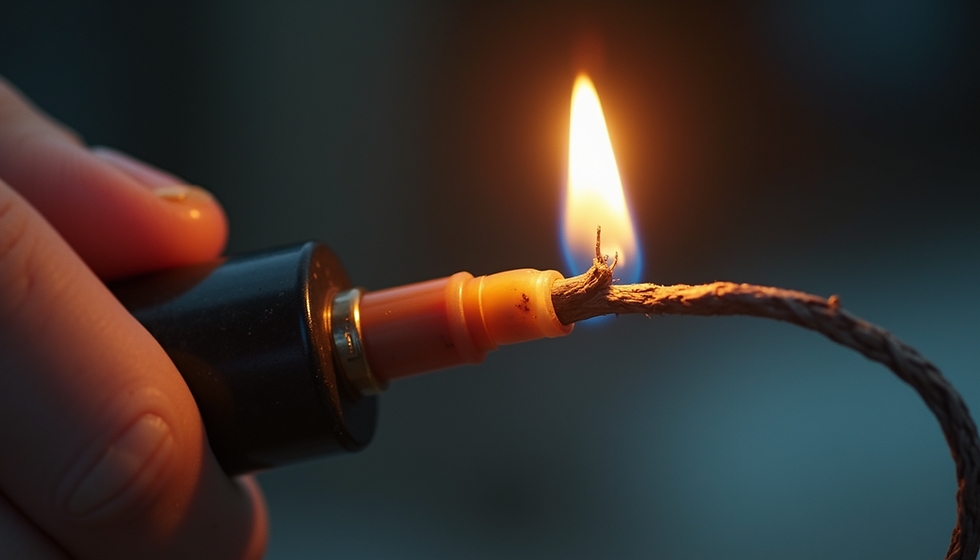
Step 4: Apply Heat Evenly
Use a heat gun or propane torch on a low setting.
Move the heat source slowly around the tube to shrink it evenly.
Watch for the adhesive to melt and bond inside the tube.
Step 5: Inspect the Seal
After cooling, check for a smooth, tight seal without gaps or bubbles.
Tug gently on the wire to ensure the tube is firmly bonded.

Benefits of Using Adhesive-Lined Tubes in Marine Settings
Using adhesive-lined heat shrink tubes offers several advantages over other waterproofing methods such as electrical tape or liquid sealants.
Long-lasting protection: Adhesive-lined tubes resist UV rays, salt spray, and temperature changes better than tape.
Neat and professional finish: Creates clean, uniform insulation that looks good and performs well.
Reduced maintenance: Once sealed, connections require less frequent inspection and repair.
Versatility: Suitable for various wire gauges and connector types.
Additional Tips for Marine Electrical Waterproofing
Always use marine-grade wires and connectors designed to withstand harsh conditions.
Combine adhesive-lined tubes with proper cable routing to avoid chafing and mechanical damage.
Regularly inspect electrical systems for signs of wear or corrosion, even if sealed.
Store spare tubes and a heat gun onboard for quick repairs during trips.

Comments